Recipe Source: http://www.youtube.com/watch?v=H3bhlnDJTyE
Please Click Here for Printable Version:
* 8 Ounces of Almond Paste
* 1 1/2 Cups of Unsalted Butter at room temperature
* 4 Large Eggs
* 1 tsp. of Almond Extract
* 2 Cups of All Purpose Flour (I always use Gold Metal or King Arthur)
* 1/4 tsp. of Salt
* 1 Cup of Sugar
* 8 oz. of Apricot Preserves
* 8 oz. of Raspberry Preserves
* Green Food Coloring
* Red Food Coloring
* 12 Oz of Semi Sweet Melting Chocolate (I Mixed Dark and Milk)
Helpful Tools:
* Kitchen Aid Mixer* 3- 9X9 inch pans (I used 3- 9X13 inch pans and I felt they came out too thin. I would recommend 3-9X9 inch Pans instead).
* Wax Paper
* A Strainer
Procedure:
* Pre-Heat oven to 350 Degrees* Get 2 small bowls and separate the Egg White from the Egg Yolks
* Put the Egg Yolks aside and the Egg Whites into the Kitchen Aid Mixer with the Whipping Attachment.
* Start on Med Low speed for 2 minutes and then on high speed for about another 5 minutes, until the Egg White form Large Peaks.
* Once the Egg Whites have formed the large peaks, add 1/4 cup of the sugar and mix for about another minute.
* Set aside.
* Grab another Large Mixing Bowl and add the Paddle attachment to the Kitchen Aid Mixer
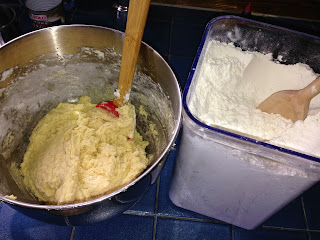
* Add the Almond Paste and remaining 3/4 cup of sugar into the Bowl and mix until it is in Crumbs
* Add the Stick of Softened Butter and Almond Extract and Mix again.
* While the Mixer is running on Medium Speed, add the Egg Yolks one Egg at a time
* Turn the Mixer off and with a Spatula fold in the Egg Whites that you set aside earlier. * Fold in the Flour, one cup at a time until well blended.
* Grab three Bowls (the size of a cereal bowl) and divide the batter into three equal parts (I think it was about 1 1/4 cups of batter in each bowl)
* Put 20 Drops of Green Food Coloring into the first bowl and mix well
* Leave the second bowl of batter as is
* Put 20 drops of Red Food Coloring into the third bowl and mix well (do not use the same spoon you used with the Green)
* Line the bottom and sides of the three Pans with Wax Paper
* With a Spoon, spread the Green Cake Batter into the first pan, the plain color cake batter into the second pan, and the Red Color Batter into the third pan.
* Bake for about 10-12 Minutes
*When Done, let cool
* While the cakes are cooling, get the jams ready.
* In a small sauce pan, heat the Raspberry Preserves
* Strain the Preserves over a bowl by pressing it around with a spoon in a strainer. Set aside.
* Heat the Apricot Preserved in a small sauce pan and Strain the Preserves over a bowl by pressing it around with a spoon in a strainer. Set aside.
* Now we are ready to assemble the cookie!
* Carefully Flip the Red Layer Cake over onto a Wax Paper covered tray.
* Slowly take the wax paper off of the top of the cake
* Spread the Raspberry Preserved all over the top of the Red layer cake
* Carefully add the Plain color cake to the top of the Red Jam Layer, and carefully rip the Wax paper off the top.
* Spread the Apricot Preserves on the top of the Plain color cake.
*Add the Green Color Cake to the top of the Apricot Preserve layer and carefully rip the wax paper off the top.
*Put a new sheet of wax paper on the top and then cover it with a heavy object (I put a wooden cutting board on top) and put it in the fridge for about 4-8 hours. (Sorry no picture of this step :( )
* When the cake is done settling in the fridge, melt the chocolate.
* Spread the chocolate all over the top of the cake and then put it back in the fridge to harden for about 15-20 minutes.
* Once that layer of chocolate has hardened, carefully flip the cake over and Spread melted Chocolate over the other side of the cake. Put back into the refrigerator to harden.
* When it is done hardening, place onto a cutting board trim all the sides of the cake (you can just munch on those scraps :))
* Cut the remaining cake into small squares or rectangles and Enjoy!.JPG)
.JPG)
.JPG)
.JPG)


.JPG)
.JPG)
.JPG)
.JPG)
.JPG)


.JPG)


No comments:
Post a Comment