Welcome!

Ciao! My name is Yolanda and I'd like to welcome you to my Blog! I have always had a love for cooking, baking and eating. This blog is mainly a place for me to record and share precious family recipes from those living and deceased as well as delicious recipes that my friends have given me throughout the years.

Translate

Thursday, April 5, 2018

Potato Gnocchi

Potato gnocchi is one of my favorite traditional Italian recipes that I grew up making.  I remember staying with my Nonna in Italy as a little girl and a vendor would drive around the streets selling potatoes and yelling "potate per gnocchi!"  I remember all the neighbors outside peeling and cutting potatoes and my friends and I pretending we were doing the same.  Although the potato gnocchi will never taste the same as they do in Italy due to their rich soil that the potatoes grow from, they still taste amazing! I found the closest potatoes to the ones you will use in Italy are Butter Potatoes.  From watching my family make potato gnocchi many many times in Italy as well as neighbors in the town, I discovered that some people put an egg in their gnocchi dough and some do not. I've learned it is almost impossible to write down exact measurements of ingredients.  Although Potato gnocchi have very very few simple ingredients, it is all about knowing what the dough should feel like.  Once you learn what the dough is suppose to feel like, then you know its perfect! So again I will write down below approximate measurements, but in the end you want a dough that is not too sticky and not too dry! Potato gnocchi taste delicious with tomato sauce, fresh basil pesto, or in soup! 
Please Click Here for Printable Version
Approximate Ingredients:
*5 lb bag of Yukon Gold Butter Potatoes
* 5 lb Bag of Good Quality Flour such as King Arthur unbleached all purpose Flour or 
Tipo 00 Flour (you may need more or less)
* 1 tsp of Salt
* 2 Whole Eggs (optional)
Tools you will need:
Potato Ricer (not a masher!!)
Wooden Board(everyone always asks me where I bought my large board, so click here and it will take you to the site I bought it on)
Large Steamer Pot
Gnocchi paddle or fork
Procedure:
* Peel Potatoes and steam until a fork can easily slide through (about 40 minutes)
~*~ It is very important to steam or bake your potatoes.  You do not want to boil them in water, because then the potatoes will have water in them causing you to need to add more flour in the dough.  This will make for a dense gnocchi instead of a lighter gnocchi~*~
* Let the potatoes cool to room temperature or until you can handle them without burning your fingers
*Grab a large bowl and put each potato through the ricer
* Add 2 Eggs (optional) and salt (Mix with you hands)
* Add Flour about a cup at a time and mix with your hands until it is the perfect consistency...Not too Sticky, yet not too dry!
* Flour your large wooden Board
* cut a small slice of dough and roll it into a long rope to desired size.  I like mine smaller, but I know many like theirs large. 
* Cut them into about 1/2 inch size pieces
* press and roll them with your thumb using a gnocchi paddle or a fork for the traditional gnocchi marks.  These marks help the gnocchi hold the sauce better!
* Place them onto a lightly floured tea towel
~*~TIP~*~ (if you are not planning on eating them right away, lay them flat onto a cookie sheet lined with wax paper or a floured tea town and freeze.   Once they are frozen you can put them in a freezer bag and tightly seal them up.  Freeze and use until you want to eat them!)
* When you are ready to eat them, Boil a large pot of salted water.  Then carefully throw the gnocchi in.  Once they float to the top, let them cook an extra minute or 2.  They cook quickly!
* Take out with a large Skimmer Strainer spoon. 
* Toss with your favorite sauce and top with some freshly grated cheese!
~*~Enjoy~*
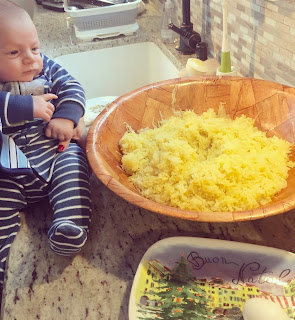
Matteo at 2 month old watching Mommy make gnocchi for Christmas 
My cousin Mario making us gnocchi for lunch in Italy 2013


Sunday, March 25, 2018

Healthy 6 Ingredient Blueberry Pancakes

        When I found out I was pregnant with my now 17 month old son Matteo, I decided I was going to be dedicated in raising him to eat mainly organic, low processed, healthy foods as much as I am able to.  In a world that is full of fast food, dye colored treats and sugar loaded parties, it can be tough, but I truly believe that if kids are taught as early as possible to eat healthy foods and junk is not an option, then they will make better decisions in their years ahead.  We recently attended a party and when Matteo was given a bite of cake, he turned his head and reached for the bowl of fruit that was on the table instead.  That was truly a proud mom moment for me! 
        Below is a recipe I came up with for a healthy pancake with only 6 ingredients and none being oils or added sugars! Matteo loves these every morning and while I switch up flavors at times and put pumpkin or apple sauce in the batter, blueberry pancakes seem to be his favorite!  These pancakes are sweet enough from the ripe banana and sweet blueberries that no syrup on top is necessary! Less sugar the better, especially for breakfast! Matteo eats these just as they are with some extra blueberries or raspberries on the side of course! 
Please Click Here for Printable Version!
Ingredients:
* 1/3 cup of Organic Quick Oats
* 2 TBSP of Organic Buckwheat Flour
* 1 Ripe Medium Sized Organic Banana
* 2 organic Eggs
* 1/4 Cup of Organic Blueberries
* Cinnamon as preferred 
Procedure:
* Heat up a non stick frying pan on medium heat and lightly rub some organic butter on the bottom.
*In a mini food processor or blender, add the oats, buckwheat flour, eggs, banana, and cinnamon and blend together until the banana show no lumps.
* Add the blueberries and blend again for a few seconds
* pour batter into the heated frying pan and cook like you would any other pancake.  
I always make one at first and throw it out and that lets me know the pan is ready to make the rest.  You can make these any size you like.  I like to make them about the size of a silver dollar for Matteo.  

~*~ENJOY~*


Wednesday, February 7, 2018

Kid Friendly Chicken Nuggets


 Now that I have a Toddler boy (15 month old) I am trying so hard to bring him up with many healthy food options and buying as much organic products as I can for him.  Let's just say my husband isn't thrilled with our grocery bill these days haha. Lately I have been buying my little guy Matteo these shaped veggie nuggets for a quick go to lunch to send with him in the day and thought I could easily replicate this with ground meat and some hidden veggies of course.  I've tried making this once before and I found the ground chicken to be so wet and gooey, but after playing around with this I finally got it right! The secret is freezing the chicken flat and then using the cookie cutters to cut out and bread the chicken while the meat is frozen! I use the left over scraps to make a chicken burgers for myself...win win and so good!
GENIUS right??!!
                                                                 Ingredients for mixture: 
*1 lb of Organic Ground Chicken
*1 Large Egg
*1/4 cup of unsweetened applesauce
* 1 small/med zucchini shredded and liquid squeezes out (about 3/4 -1 cup)
                                                       Ingredients for Breading:
*2 Large Eggs
*Unseasoned Breadcrumbs
*Salt and garlic powder to season (optional)

                                                                  Procedure:
*In a bowl combine: Ground Chicken, 1 Large Egg, shredded Zucchini, apple sauce, and salt to season.
~*~ this mixture will feel very soft and gooey~*~


*Place wax paper on a baking tray and with another piece of waxed paper spread chicken mixture to desired thickness. This will make it so the chicken does not stick to your fingers and you’ll get a nice smooth surface.
~*~Mine were about about a little less than 1/4 inch thick~*~

 
*Place in the freezer for a few hours until it is completely frozen.
~*~This is a very important stuff because if it’s not fully frozen it will be too soft to cut into shapes~*~


*Once the chicken is completely frozen you are ready to cut it into fun shapes! I just use whatever cookie cutters I had on hand. 2-3 inch cookie cutters work best!
*Place frozen chicken nuggets back on the baking tray to get ready for breading.
*If the nuggets are defrosting then just put them back in the freezer. 

                ~*~Make chicken burgers out of the scraps!~*~                                                    
*Next, get two dishes and scramble the eggs in one dish and put breadcrumbs in the other. You can season the breadcrumbs with salt and garlic powder or whatever seasonings that you prefer!
*Dip the frozen chicken nuggets in the egg and then in the breadcrumbs and place them back onto the baking tray. 

 *Once they are all breaded you can put them in a seal tight plastic freezer container or in a freezer bag and put in the freezer until you are ready to eat them!                                   
 
*When you would like to bake them simply preheat the oven to 425 degrees Fahrenheit, take out the amount of chicken nuggets you want, brush both side of the chicken with Olive Oil and bake them for about 8  minutes or so on each side until fully cooked and lightly golden brown in a cooking dish or baking sheet.
 
                                                                    ~*~Enjoy!~*~