Welcome!

Ciao! My name is Yolanda and I'd like to welcome you to my Blog! I have always had a love for cooking, baking and eating. This blog is mainly a place for me to record and share precious family recipes from those living and deceased as well as delicious recipes that my friends have given me throughout the years.

Translate

Thursday, December 27, 2012

Bolognese Sauce over Pappardelle Pasta


I hope everyone had a wonderful Christmas! I sure did. I had a house full of 18 people Christmas Eve to cook for and then on Christmas Day I went over my cousin's house.  My husband also surprised me with a Kitchen Aide! I can't wait to use it!

This past week I have has so many desserts that I can't even look at anymore! Maybe you feel the same way? Today I am going to share a recipe for Bolognese that I put over Parpadelle Pasta.  This is a very meaty pasta and has very little tomato sauce that goes into it.  When me and my husband were traveling around Italy this past summer, Jimmy pretty much ordered Pasta Alla Bolognese at every restaurant we went to.  This is a sauce that comes from Bolognia, Italy which is why it is called "alla Bolognese" "From Bolognia."  This sauce I made, I got from the Italian cooking show "Giallo Zafferano."  Although it didn't taste like the one we had in Italy, it was still absolutely Delicious!
Ingredients:
*4 ounces of diced Pancetta (you can find this at Wegmans already diced or any Italian import store)
~*~Note~*~Do not use bacon!* 1/2 pound of ground beef
* 1/2 pound of ground pork
* 1 cooking Onion
* 1 stalk of celery and
*  1 stalk of Carrot
* 3 Tablespoons of Tomato Paste
* 3 Tablespoons of Olive Oil
* 3 1/2 Tablespoons of butter
* 1 cup of Whole Milk
* 1 cup of Dry Red Wine
* 1 cup of Beef Stock
* Pepper and salt to taste
* 3/4 LB of Pappardelle
Optional: 1 can of Crushed San Marzano Tomatoes (if you like it more moist with more tomato flavor)
Procedure:
~*~Note~*~ This sauce is easy to make, but takes about 3 hours to cook.  Be patient, because the longer it cooks, the more flavorful the sauce will be!)
* Mince the onion, carrot and celery (I do this in my mini food processor. It saves tons of time!)
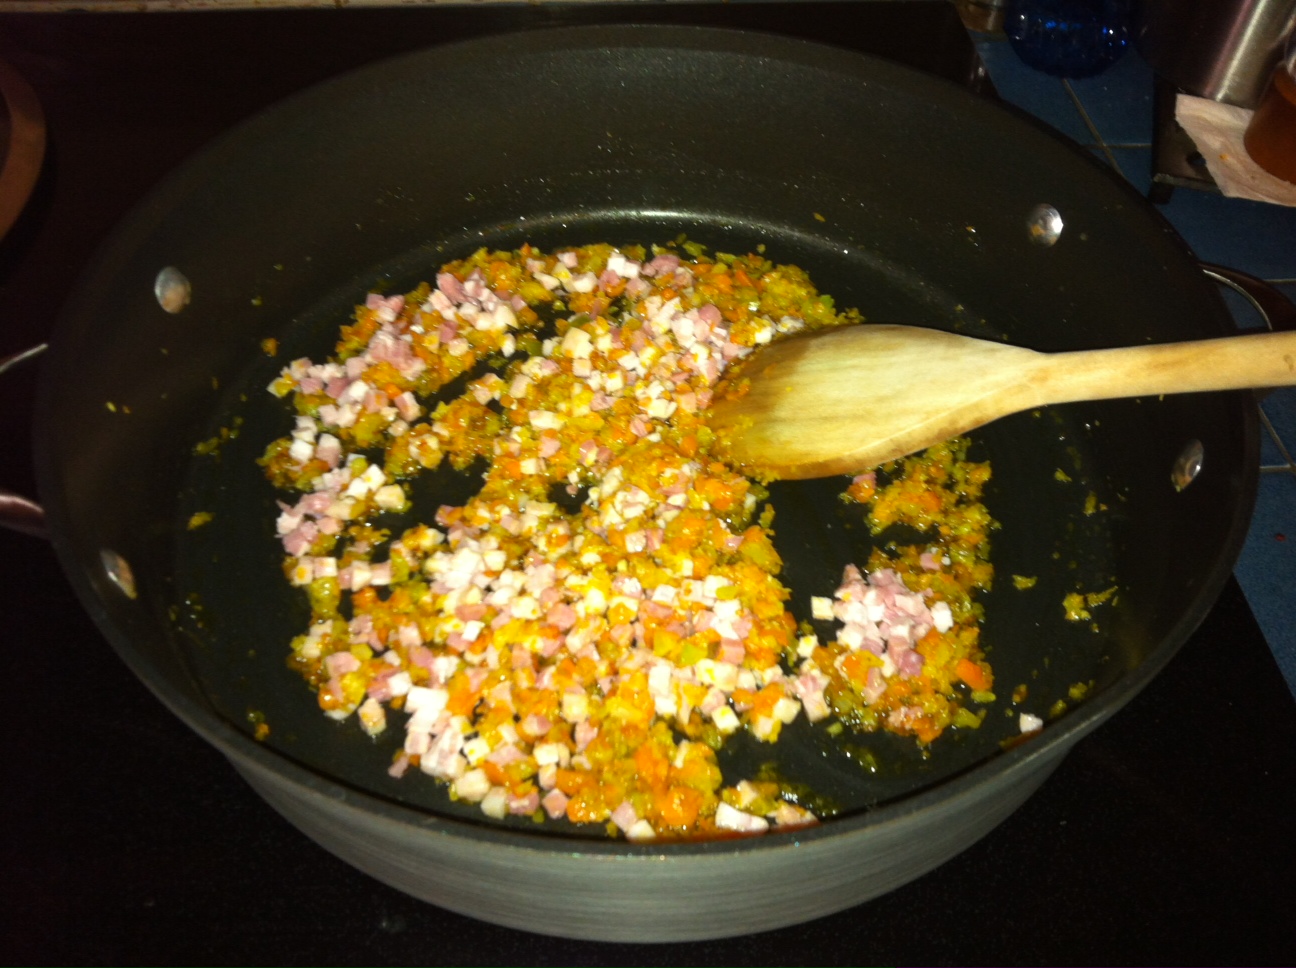
* In a large pot, add the olive oil and the butter and to that add the vegetable mixture.
*  Sautee it on med-low heat for about 60 minutes until it is soft, just before it goes golden.
* When the vegetables are done, add the diced Pancetta anf cook until lightly golden
* Next, add the ground beef and pork and brown on Medium Low heat for another 30 minutes, until fully cooked.
* Once the meat is well cooked, add the glass of red wine and cook until the wine is completely absorbed.
* When the wine has cooked out and the meat is getting a bit dry, add the tomato paste which you can thin out with a bit of beef stock.
* Stir, salt, lower the heat, and now the ragu must simmer. Continue cooking it on a very low heat for about an hour and a half.
* Add broth little by little as you cook to keep the meat moist.
Note: at this point you can also add the crushed tomatoes if you like
* When the sauce is done simmering, boil the Pappardelle Pasta in lightly salted water.
~*~Note~*~The reason Pappardelle Pasta is used, is because the sauce is very meaty and the Pasta holds the sauce very well!)
* While the pasta is boiling, add the milk and leave it on low heat to absorb completely.  Add salt and pepper to taste.
* Drain the Pasta and toss it into your sauce.
* Serve with Grated cheese on top
Enjoy!

Sunday, December 23, 2012

Italian Meatball Cookies

In my last post I shared a family recipe from my grandma's side of the family.  Today I am going to share a holiday family recipe from the Caccamo side of the family.  This recipe has been in my family for many years.  It was my grandpa Caccamo's sister's recipe, my Great Aunt Mary. My cousins and I recently started emailing old family recipes back and forth to each other and this was one my cousin forwarded to us.  My great Aunt Mary has passed, but this recipe lives on through her family members who are still making them today. 
Ingredients:
~*~This recipe makes about 15-16 dozen cookies~*~
* 1 cup of room temperature Crisco Shortening (original, not butter flavor)
* 1 1/2 cups of Granulated Sugar
* 3 large Eggs
* 1 cup of 2% OR Whole Milk
* 1 tsp. of Vanilla
* 4 1/2 cups of Flour
* 5 tsp. of Baking Powder
* 1 TBSP. of Cinnamon
* 1 TBSP. of ground Nutmeg
* 1 1/2 tsp. of ground Cloves
* 3/4 cup of Unsweetened Cocoa Powder
* 1 cup of Semi Sweet Chocolate Chip Cookies
* 1 cup of chopped Walnuts
* 1/2- 1 cup of Golden Raisins
~*~Note~*~ this is the original recipe, but feel free to leave out the raisins, nuts or chocolate chips or feel free to add more of one than the other. 
Procedure:
* Preheat oven to 350 degrees F.
* In a mixing bowl with an electric mixer, cream together the Shortening, Sugar, and Eggs
* Add, the Milk and Vanilla and mix well. Set aside.
* In a separate bowl put, the Flour, Baking Powder, Cinnamon, Nutmeg, Cloves, and Unsweetened Cocoa Powder. Give a quick stir.
* Sift the dry ingredients into the wet ingredients. Mix Well with a strong spatula.
* fold in the Walnuts, Chocolate Chips and Raisins until they are fully incorporated into the dough.
* Roll dough into 1 inch balls and place on an ungreased cookie sheet or a cookie sheet lined with parchment paper.
* Bake for 9-10 minutes on 350 degrees
* Place on cooking rack when done.
* Once completely cool start making the glaze.
Glaze Ingredients:
* 1/4 cup of 2% or Whole Milk
* 2 cups of Confectioners Sugar
Procedure:
* Warm the milk
* Put the confectioners Sugar in a bowl and slowly add in a little milk at a time and whisk until you get the right consistency.  If it is too thin, add more confectioners sugar.  It should only be slightly runny.
* Dip the top of the cookie into the glaze and place on a cookie sheet lined with wax paper.  While wet you have the option of sprinkling the crystal red and green sprinkles on top. (I forgot to buy them, so mine are sprinkles).
* Once completely dry, you can store in an airtight container for about a week or freeze. 
Enjoy!
*Here is a photo of a cookie tray I made for work friends and neighbors


Saturday, December 22, 2012

Chiacchiere (Italian Ribbon Cookies)

Wow! It has been a very long time since I have posted recipes on here!  I have been doing lots of cooking and baking though, but my life as a teacher has been so unbelievable busy that I have not had time to spend on my computer blogging.  I am off for winter break though, so I will do my best to put up all the wonderful things I have been making in my kitchen!  For starters, my grandma and I just made our  traditional Italian Ribbon Cookies, which in Italian are known as "Chiacchiere" and we usually make them for the holidays.  This recipe has been in my 92 year old grandma's Lopresti side of the family for many generations and we have been making them together ever since I was just a little girl.
Ingredients:
* 2 large eggs
* 1/2 cup of granulated sugar
* 2 tsp. baking powder
* 1/3 cup of Vegetable Oil
* 1/3 cup of 2% or Whole Milk
 1 tsp. of vanilla
* 2 1/2 cups of Flour (plus more for rolling later)
* Vegetable Oil for frying
* Confectioners Sugar to sprinkle on top of the ribbons in the end.
* Honey for dipping (optional)
Special Tools Needed:
* A Rolling Pin
* A large flat surface (I use an Extra Large Wooden Board)
* A pizza cutter, knife, or a ravioli cutter (I used a ravioli cutter, because I like the ruffled look on the edge)
* An oil draining station with paper towel
Procedure:
* In a large bowl mix the eggs, and sugar with a whisk
* Add the vegetable oil, milk and vanilla and mix again very well
* Sift the Flour and baking powder into the wet mixture
*at this point mix with a wooden soon or strong spatula, until it forms a dough. (The dough should resemble the texture of cut out cookie dough)
*  On a flat surface, cover with a little flour and save some on the side in case you need more.
* Take about a tennis ball size of dough and roll it out with a rolling pin until it is about 1/8 of an inch thick.  You can make yours thinner if you prefer a thinner ribbon.  They do rise when they fry.
* Cut into about  1/2 by 3 1/2 inch strips.  Once you have the strips you can choose to keep them flat ribbons or fold them over into different ribbon look (like the breast cancer ribbon shape).  I mix them up and do both. It makes them look very pretty.
* Meanwhile, in a pot for frying, fill the pot at least 3 inches deep with Vegetable Oil and heat until hot.
* Once the Oil is sizzling lower it to a medium/med low heat
* Drop one of the ribbons on into the hot oil, just to test one out to make sure the oil is the right temperate. 
* Once you feel the oil is at the perfect temperate you can start to fry the rest by placing about 7 ribbons in the oil at a time.  If you put any more, you will not be able to remove them quick enough and they will burn. 
*Once one side of the ribbon is a very lightly golden, flip it over for a few more seconds on the opposite side and remove them with a large fork onto paper towel to drain.
* Once all the ribbons are fried, put some paper towel on a serving platter, arrange the ribbons on top and sprinkle with powdered sugar. 
* My family likes to dip them in honey and eat them while they are hot.
* You can wrap the Ribbons in plastic wrap or store in an air tight container for 2-3 days.
Enjoy!
Here is a photo of grandma still making the ribbons after all these years!