Welcome!

Ciao! My name is Yolanda and I'd like to welcome you to my Blog! I have always had a love for cooking, baking and eating. This blog is mainly a place for me to record and share precious family recipes from those living and deceased as well as delicious recipes that my friends have given me throughout the years.

Translate

Tuesday, December 30, 2014

Arancini con Prosciutto Cotto e Mozzarella (Fried Rice Balls with Ham and Mozzarella)

 
        One of my favorite Italian comfort foods is by far Arancini. Arancini are stuffed rice balls which are coated with breadcrumbs and fried.  They are typically stuffed with cheese, peas, ragu or ham and anything else you wish to add to it. In Italian the word "Arancia" means orange and so since this fried treat resembles an orange, it therefore got the name Arancini.   
        About a year ago I became good friends with a couple from Palermo, Sicily named Simona and Fabrizio.  They recently got married and have moved here to the US to go to school and work. One evening Simona and Fabrizio invited me over to their apartment to have Arancini in honor of a special Saint's day called "Santa Lucia" (my mother's name day).  This day is celebrated on the 13th of December. Simona told me that in Palermo one of the traditional ways they celebrate this day is by making many many Arancini Balls and then eating them until they are too full to move!  She said her friends back home were already competing on who had eaten the most.  I was honored to be asked to enjoy this treat with her and her husband on this day and more than willing to do my share of eating! 
        Simona and Fabrizio spent Christmas day at my house with my husband and brother and we made Arancini together along with a few other goodies.  She shared her family recipe for making Arancini the Sicilian way and we had a lot of fun cooking and of course eating together! Simona said she loves to make hers with Prosciutto Cotto (Ham) and Mozzarella, but once you make the base, you can add anything you like to it!  So here it is...Simona's Sicilian recipe for Arancini!  
*Note- she doesn't have an exact recipe, so I did my best to write down the amounts she used.
Please Click Here for Printable Recipe:
Ingredients: Makes about 25 Arancini
Not Pictured: Butter and Olive Oil
  • 4 Cups of Arborio Risotto Rice
  • About 12 Cups of Chicken Broth (You may or may not use all of the broth)
  • About 7 oz of Prosciutto Cotto, Sliced Thin (Regular Plain Ham)
  • 8 Oz. of Fresh Mozzarella Cheese
  • 1 Cup of Freshly Grated Parmesan Cheese
  • 2 TBSP of Extra Virgin Olive Oil
  • 6 TBSP of Unsalted Butter
  • 4-5 cups of Unseasoned Breadcrumbs
  • 4 Eggs (may need more)
  • Vegetable or Canola Oil for Deep Frying
  • Dice the Ham, set aside.
*Saffron is Optional for coloring of the rice
Directions:


  • Dice the Mozzarella, set aside. 


  • In a saucepan bring the broth to a simmer and keep it warm for making the Risotto.


  • Get a large pan, and add 2 TBSP of Extra Virgin Olive Oil and the Arborio Rice.  Stir for about 1 minute.


  • While continually stirring, begin adding the hot broth in 1/2 cup increments, allowing the liquid to become completely absorbed before adding more broth (This process is very important as you do not want to add all the broth at once like you would with regular white rice).
  • Cook until the rice is just tender (al dente) and the risotto is creamy. This process takes time about 20-30 minutes, so be patient!
Simona
  • Once the Risotto is Al Dente, turn off the heat and add the Butter.  Stir until melted and blended.


  • Now add the Freshly Grated Parmesan Cheese and mix.


  • Add about 1/2 of the Diced Mozzarella and 1/2 of the Diced Ham to the Risotto and mix well.


  • Let the Risotto Cool down for about 30-45 minutes to Room Temperature (If you are planning on making this the next day, then you can cover it up and put it in the fridge)
  • Once the Risotto has cooled, Set up your breading and stuffing Station. 
  • Get a bowl or plate and Beat the eggs in it
  • Get another bowl or Plate for the Breadcrumbs
  • Have the remaining Diced Ham and Mozzarella also out and ready. 
  • Have a bowl with some water ready (this prevents the Risotto from sticking to your hand when you roll them).


  • Now it is time to assemble the Arancini!
  • With slightly wet hands, Take about 3-4 TBSP of Risotto (You can make them any size you like)
  • Make a hole it it with your two fingers and add some Diced Mozzarella and Diced Ham to the middle.


  • Close the hole back up and Roll it into a Ball or Pear Shape.
 
  • Coat it in the Egg Mixture and then in the Breadcrumbs and place on a Cookie Sheet.


  • Continue this Process with the remaining Risotto.


  • When you have finished, the next step it to fry them up!
  • Pour Vegetable or Canola oil in a Medium Saucepan, about 4 inches Deep.
  • Get the Oil Very Hot, about 360 Degrees F
*Note - Only Fry the ones you want to eat.  You can Freeze the ones you are not going to eat, by laying them flat on a tray in the freezer for an hour and then transferring them into a Freezer Bag.


  • Once the Oil is hot, Add the Arancini, about 2 at a time to the Hot Oil 
  • Fry for About 1-2 minutes or until lightly golden brown and remove with a slotted Spoon.


  • Place the Arancini on tray lined with Paper Toweling to Absorb some of the Oil.
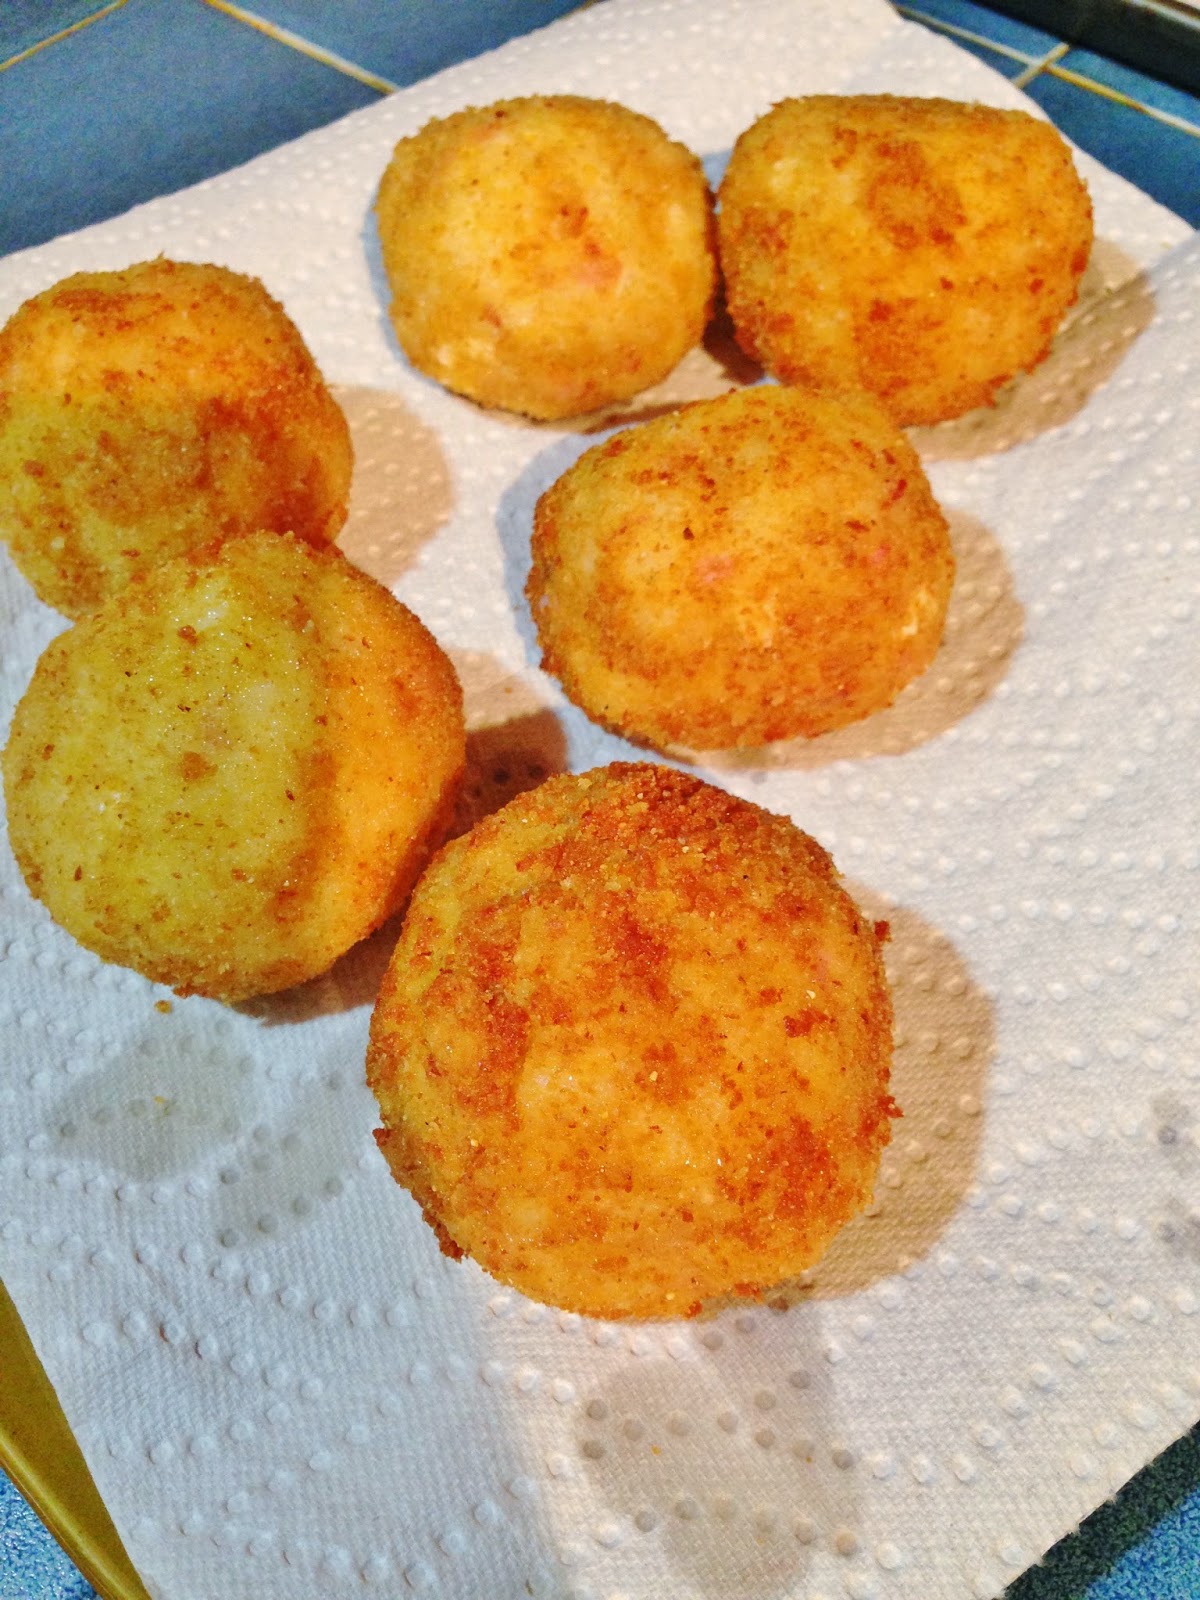
               

~Enjoy your Arancini Hot and Crispy!

Sunday, October 19, 2014

Pumpkin Biscoff Pound Cake

Whenever flying to Italy, one of the snacks given to me on the flight has been these Belgium cookies called Biscoff Cookies. Those of you who have had them before know how amazing these cookies taste and for those who haven't, really need to go out and buy some if you can.  I was so excited when our local Grocery Store (Wegmans) started selling them and I was even more excited when I saw that they sold it in a creamy or crunchy spread form sealed up in a jar!  WARNING! The Biscoff spread dangerously good and one can not help but be tempted to eat many spoonfuls of it in a sitting!

Now that Fall is here I wanted to find ways to incorporate the Biscoff with Pumpkin and so through an Internet search, I found an incredibly fattening, but incredibly delicious recipe for Pumpkin Biscoff Pound Cake! With Pumpkin, Cinnamon, Vanilla, and Biscoff flavors all blended together, it was sure a winning dessert to make and eat on a Fall night!
Please Click Here For Printable Version
Adapted from: fivehearthome.com 
Ingredients for the Cake:
  • 1 cup of unsalted butter (2 sticks), softened at room temperature
  • 2 cups of Granulated Sugar
  • 2 Large Eggs, at room temperature
  • 2 Tsp. of Pure Vanilla Extract
  • 15 oz of pureed Pumpkin
  • 1 cup of Sour Cream
  • 1/4 cup of Creamy Biscoff Spread (usually found where the peanut butter is)
  • 3 Cups of All Purpose Flour
  • 2 tsp. of Baking Soda
  • 1/2 tsp. of Salt
  • 1 1/2 tsp. of Ground Cinnamon

Ingredients for the Glaze:
  • 1/2 cup of Creamy Biscoff Spread
  • 2 TBSP. of Powdered Sugar
  • 2-3 TBSP of Milk as needed

Procedure:
  • Preheat oven to 350 Degrees F.
  • Using an electric mixer, beat the butter for about a minute until creamy.
                                   

  • Add Sugar and beat another minute


  • Add the Eggs, Pumpkin Puree, Vanilla, and Biscoffand mix on Medium High Speed
  • Blend in the Sour Cream
                                                             
  •  Now add in the dry ingredients: Flour, Baking Soda, Salt, and Cinnamon


  • Once blended together, Pour into a well greased Bundt Pan or Angel Food Cake Pan
                                                                                                      
  • Bake uncovered for 30 minutes.


  • After 30 minutes, cover the top with foil and bake for about another 30 minutes.


  • Let the cake cool completely.

  •  When ready to serve, mix the ingredients for the Glaze together and spread over the top of the cake, letting some of it drip down the sides.


~*~Enjoy~*~

Monday, October 6, 2014

Chili Con Carne

My dad did a lot of the cooking when I was a child and one of his signature meals when the weather got cooler was always Chili Con Carne. Back then my dad always had to make a separate chili for me with no beans and no hot spices.  He would make fun of me for it saying that basically what I was eating should not be considered chili haha and I guess he was right.  Now that I'm an adult, I like the beans in it and I love it spicy! Due to medical reasons my dad forgot how to make his chili and never wrote it down, so I have been trying to play with different recipes to come up with one similar.  I haven't been able to make one just like my dad used to make us, but I have perfected a Chili of my own.  
Please Print Here For Printable Version:
Ingredients:
  • 3 lbs of 90% Lean Ground Beef
  • 1 TBSP of Olive Oil
  • 1 Large Cooking Onion, Diced
  • 1 Large Green Bell Pepper, Diced
  • 3 Cloves of Garlic, Minced
  • 4 TBSP of Worcestershire Sauce 
  • 2 tsp. of Ground Cumin
  • 5 TBSP of Chili Powder
  • 2 TBSP of Mexican Hot Chili Powder (found in the spice isle) )
  • 10 oz can of Rotel Original Diced Tomatoes and Green Chilies
  • 1 1/2 cups of Beef Stock
  • 12 oz Jar of Medium Chili Sauce (Wegmans Brand)
  • 2 1/2-3 cups of water (I just filled the Chili Jar Bottle twice with water)
  • Salt and Pepper to Season
  • 16 oz can of Bush's Dark Kidney Beans
  • 16 oz can of Bush's Light Kidney Beans
  • *Optional Shredded Monterrey or Cheddar Cheese to sprinkle on top when serving

Procedure:
  • Dice your Bell Pepper and Large Onion and Mince Garlic and set to the side.  


  • In a Large Pot, heat Olive Oil on Medium High Heat.
  • Add Ground Beef and cook until thoroughly cooked, breaking it into crumbles.
  • Season with Salt and Pepper.


  • Add the Diced Pepper and Onion and Minced Garlic and cook for about 5 minutes.


  • Add the Worcestershire Sauce, Cumin, Chili Powder and Mexican Chili Powder and cook for about 5 minutes.


  • Add the Chili Sauce, Water, Beef Stock, and Rotel Tomatoes.


  • Bring Heat to a Simmer and cover the pot leaving it partially opened to let the liquid absorb.
  • Let simmer for 30 minutes.


  • After 30 minutes, Rinse the Kidney Beans in water and add them to the Chili Mixture.


  • Let cook for another hour with the lid partially opened and stir the chili about every 20 minutes. Add more Salt if needed.


  • Serve it up in bowls (My husband and I love ours with Shredded Cheese and homemade biscuits)


~*~Enjoy!~*~