Welcome!

Ciao! My name is Yolanda and I'd like to welcome you to my Blog! I have always had a love for cooking, baking and eating. This blog is mainly a place for me to record and share precious family recipes from those living and deceased as well as delicious recipes that my friends have given me throughout the years.

Translate

Showing posts with label Beef/Chicken/Pork/. Show all posts

Tuesday, February 12, 2019

Stuffed Zucchini Boats

I recently tried this new service called Misfit Market.  It cost me under $20 with a code to get a box of fresh and organic fruits and vegetables delivered to my door.  I was pleasantly surprised with my box as it was filled with many of my favorites including, avocados, broccoli, bell peppers, oranges, limes, and my all time favorite Green and Yellow Zucchini.  The zucchini were so large and beautiful.  While thinking about what I could do with them, Stuffed Peppers came to mind and how I could make a filling similar and just stuff the zucchini instead of a pepper.  The result...something incredibly delicious that even my husband ate two!
Please Click Here for Printable Version:
Ingredients:
  • 3 Large Zucchini
  • 1 Onion (about ⅓ c. diced)
  • 3 TBSP. Tomato Paste
  • 1 lb of Ground Sweet Italian Pork Sausage (I used patties, but you can always squeeze it out of the casing if using links)
  • ½ Cup of Grated Cheese, I use a mix of Pecorino and Parmesan
  • ½ Cup of Uncle Ben’s Rice (not minute rice)
  • Extra Virgin Olive Oil
  • Salt and Pepper to taste
  • Optional~ Shredded Mozzarella or Provolone Cheese

Procedure:
  • Preheat oven to 425 F.
  • Make Rice according to box (½ c. rice, 1 ¼ c. water, Salt)
  • While rice is cooking, cut zucchini in half and spoon out the inside making it looks like boats (keep the inside)
  •                         
  • Line a baking sheet with foil and rub Olive Oil all over the outside and bottoms of the Zucchini Boats and line them across the baking sheet.
  • Next, dice the onion and chop the scooped out part of the zucchini
  • Drizzle Olive Oil into a large frying pan and turn the heat on Med-High
  • Cook Sausage and Onion, breaking the sausage up into small parts.  Cook fully.
  • Add chopped zucchini and cook another 5 minutes then Season with Salt and Pepper
  • Add 3 TBSP. of Tomato Paste
  • Turn off heat and stir in Rice and Grated Cheese
  • Spoon filling into Zucchini Boats until all the filling is used up
  • Bake for 25 minutes
  • Top with freshly grated cheese, shredded mozzarella or provolone
~Enjoy~

Wednesday, February 7, 2018

Kid Friendly Chicken Nuggets


 Now that I have a Toddler boy (15 month old) I am trying so hard to bring him up with many healthy food options and buying as much organic products as I can for him.  Let's just say my husband isn't thrilled with our grocery bill these days haha. Lately I have been buying my little guy Matteo these shaped veggie nuggets for a quick go to lunch to send with him in the day and thought I could easily replicate this with ground meat and some hidden veggies of course.  I've tried making this once before and I found the ground chicken to be so wet and gooey, but after playing around with this I finally got it right! The secret is freezing the chicken flat and then using the cookie cutters to cut out and bread the chicken while the meat is frozen! I use the left over scraps to make a chicken burgers for myself...win win and so good!
GENIUS right??!!
                                                                 Ingredients for mixture: 
*1 lb of Organic Ground Chicken
*1 Large Egg
*1/4 cup of unsweetened applesauce
* 1 small/med zucchini shredded and liquid squeezes out (about 3/4 -1 cup)
                                                       Ingredients for Breading:
*2 Large Eggs
*Unseasoned Breadcrumbs
*Salt and garlic powder to season (optional)

                                                                  Procedure:
*In a bowl combine: Ground Chicken, 1 Large Egg, shredded Zucchini, apple sauce, and salt to season.
~*~ this mixture will feel very soft and gooey~*~


*Place wax paper on a baking tray and with another piece of waxed paper spread chicken mixture to desired thickness. This will make it so the chicken does not stick to your fingers and you’ll get a nice smooth surface.
~*~Mine were about about a little less than 1/4 inch thick~*~

 
*Place in the freezer for a few hours until it is completely frozen.
~*~This is a very important stuff because if it’s not fully frozen it will be too soft to cut into shapes~*~


*Once the chicken is completely frozen you are ready to cut it into fun shapes! I just use whatever cookie cutters I had on hand. 2-3 inch cookie cutters work best!
*Place frozen chicken nuggets back on the baking tray to get ready for breading.
*If the nuggets are defrosting then just put them back in the freezer. 

                ~*~Make chicken burgers out of the scraps!~*~                                                    
*Next, get two dishes and scramble the eggs in one dish and put breadcrumbs in the other. You can season the breadcrumbs with salt and garlic powder or whatever seasonings that you prefer!
*Dip the frozen chicken nuggets in the egg and then in the breadcrumbs and place them back onto the baking tray. 

 *Once they are all breaded you can put them in a seal tight plastic freezer container or in a freezer bag and put in the freezer until you are ready to eat them!                                   
 
*When you would like to bake them simply preheat the oven to 425 degrees Fahrenheit, take out the amount of chicken nuggets you want, brush both side of the chicken with Olive Oil and bake them for about 8  minutes or so on each side until fully cooked and lightly golden brown in a cooking dish or baking sheet.
 
                                                                    ~*~Enjoy!~*~

Monday, October 6, 2014

Chili Con Carne

My dad did a lot of the cooking when I was a child and one of his signature meals when the weather got cooler was always Chili Con Carne. Back then my dad always had to make a separate chili for me with no beans and no hot spices.  He would make fun of me for it saying that basically what I was eating should not be considered chili haha and I guess he was right.  Now that I'm an adult, I like the beans in it and I love it spicy! Due to medical reasons my dad forgot how to make his chili and never wrote it down, so I have been trying to play with different recipes to come up with one similar.  I haven't been able to make one just like my dad used to make us, but I have perfected a Chili of my own.  
Please Print Here For Printable Version:
Ingredients:
  • 3 lbs of 90% Lean Ground Beef
  • 1 TBSP of Olive Oil
  • 1 Large Cooking Onion, Diced
  • 1 Large Green Bell Pepper, Diced
  • 3 Cloves of Garlic, Minced
  • 4 TBSP of Worcestershire Sauce 
  • 2 tsp. of Ground Cumin
  • 5 TBSP of Chili Powder
  • 2 TBSP of Mexican Hot Chili Powder (found in the spice isle) )
  • 10 oz can of Rotel Original Diced Tomatoes and Green Chilies
  • 1 1/2 cups of Beef Stock
  • 12 oz Jar of Medium Chili Sauce (Wegmans Brand)
  • 2 1/2-3 cups of water (I just filled the Chili Jar Bottle twice with water)
  • Salt and Pepper to Season
  • 16 oz can of Bush's Dark Kidney Beans
  • 16 oz can of Bush's Light Kidney Beans
  • *Optional Shredded Monterrey or Cheddar Cheese to sprinkle on top when serving

Procedure:
  • Dice your Bell Pepper and Large Onion and Mince Garlic and set to the side.  


  • In a Large Pot, heat Olive Oil on Medium High Heat.
  • Add Ground Beef and cook until thoroughly cooked, breaking it into crumbles.
  • Season with Salt and Pepper.


  • Add the Diced Pepper and Onion and Minced Garlic and cook for about 5 minutes.


  • Add the Worcestershire Sauce, Cumin, Chili Powder and Mexican Chili Powder and cook for about 5 minutes.


  • Add the Chili Sauce, Water, Beef Stock, and Rotel Tomatoes.


  • Bring Heat to a Simmer and cover the pot leaving it partially opened to let the liquid absorb.
  • Let simmer for 30 minutes.


  • After 30 minutes, Rinse the Kidney Beans in water and add them to the Chili Mixture.


  • Let cook for another hour with the lid partially opened and stir the chili about every 20 minutes. Add more Salt if needed.


  • Serve it up in bowls (My husband and I love ours with Shredded Cheese and homemade biscuits)


~*~Enjoy!~*~

Tuesday, December 31, 2013

Carpinone Style Polenta

As most of you know, my mom was born and raised in the Region of Molise, Italy in a Little village of 1500 people called Carpinone.  Her village is surrounded by farm land, stone houses, spring water and beautiful mountains.  The majority of the people in this village are not at all rich, but the food they eat is fresh and home grown.  The food they served always depended on the season and what they sold at the market or found in their gardens.  One of those staple foods my mom grew up with was Polenta.  Polenta is basically corn meal and it can be made in many different ways.  In the town my Nonna (grandma) grew up in, a village called Castelpetrosa, they make their Polenta harder and then would slice it with dental floss like string and make a Lasagna with it.  In my mom's village Carpinone, they like it soft and it is eaten with fresh tomato sauce, made with fresh Mushrooms grown on top of the mountains and topped with Sausage.  My mom said they would eat this at least once a week and she remembers getting up early to make it with my Nonna.  They would cook it in a large pot over the fire in their fireplace.   Since this was a staple in her home growing up, of course it was also one in mine growing up as well, so I learned to love eating it. My mom always spread it out on a wooden board and topped it with sauce, grated cheese, and Italian Sausage.  When we had company they would request this, as it is not only delicious, but fun to eat together as well.  The other day my mom made this for my family and it was my husbands first time having it.  My whole family devoured it and my husband of course, being the carnivore that he is, ate a little bite and then just at all the sausage off the top.  I guess Polenta is just not his thing ha ha, but I was proud of him for trying it!  Next time  you have your family coming over, try making this, as it is a fun and rustic meal to share with your family or friends. 
Eating Polenta off the board as a child 

From Left to right: My Grandfather Sebastiano, me, my brother Sebastian, and my mother Lucia
Ingredients:
                                      
* 12 cups of water 
* 2 tsp of Sea Salt 
* 1 lb of Corn Meal 
* About 3-4 cups of sauce (my mom makes a homemade marinara with Shataki
Mushrooms
 * Freshly grated Parmesan cheese 
* About 5-6 Italian Sausage Links,sliced (baked or grilled (my mom baked hers with sweet bell peppers and sage) 
Procedure:
* Take your cooked Sausage, cut it into slices and set it aside or in the oven to stay warm.
*Fill a large pot with 12 cups of water until it comes to a boil
*Once it comes to a boil, add salt 
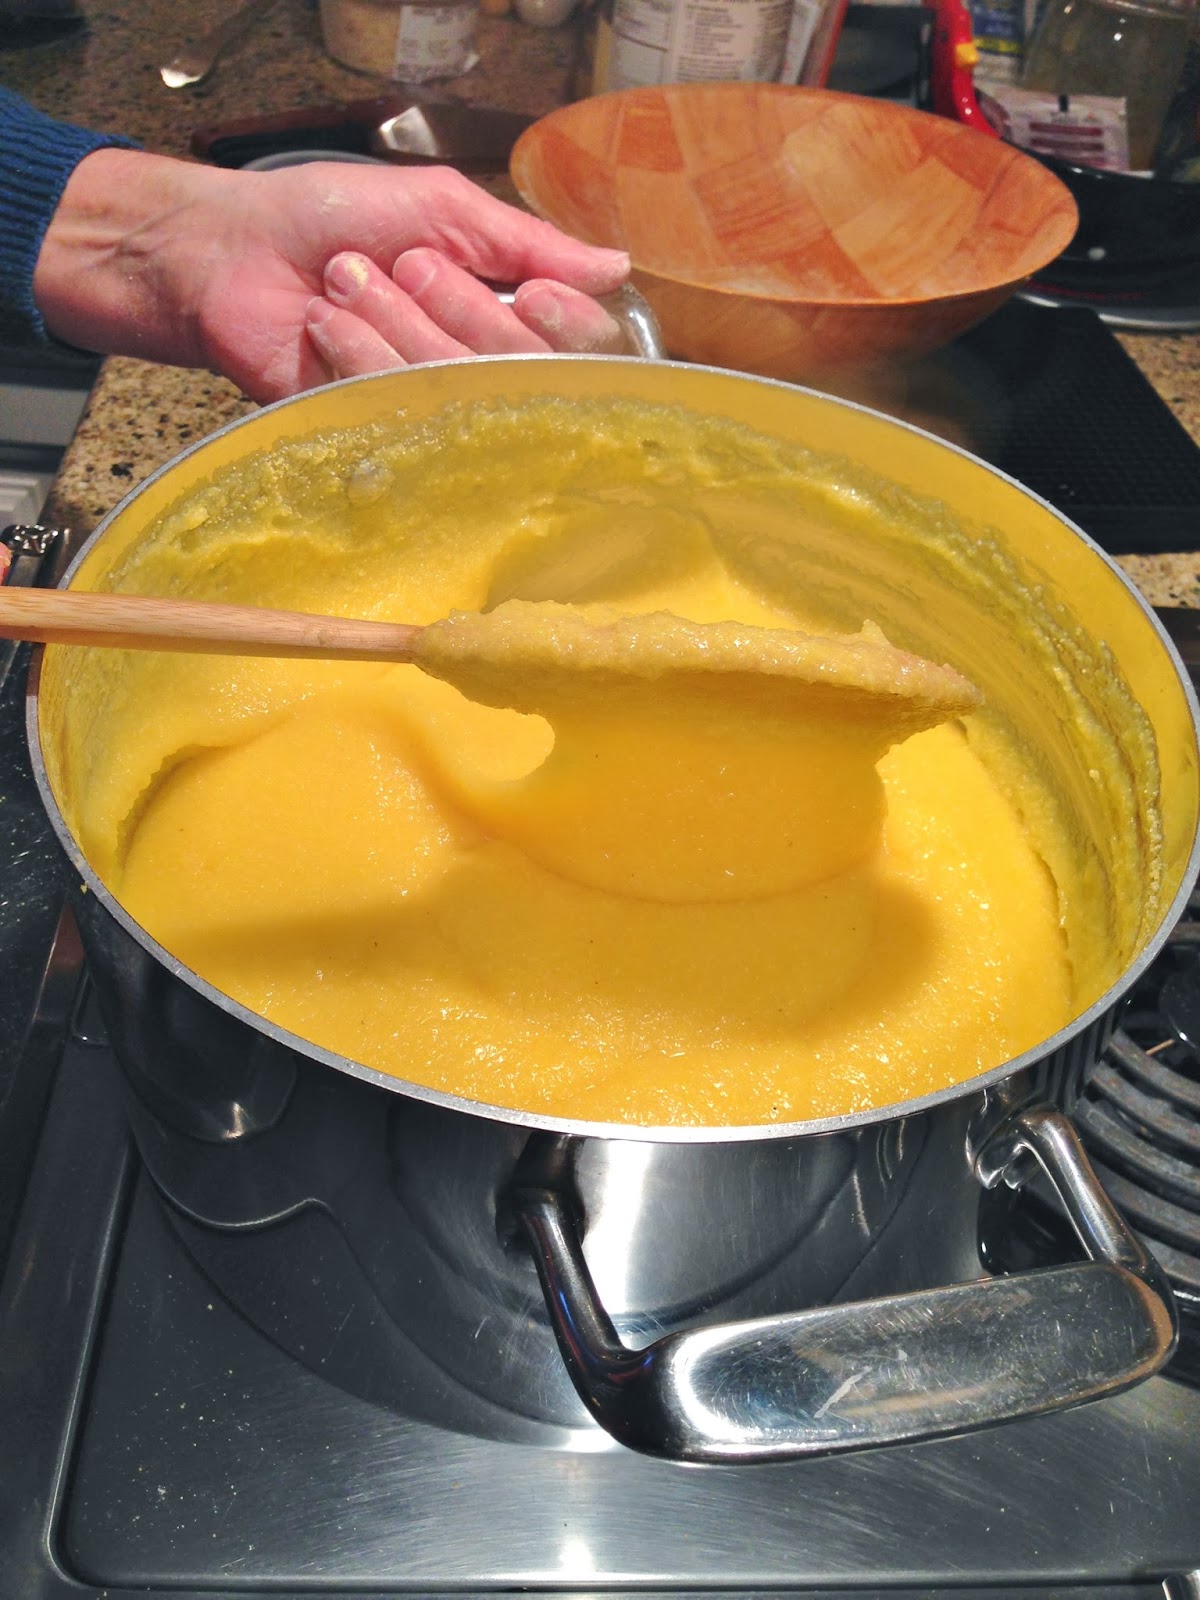
* Turn the heat on med low and slowly whisk the Polenta in the water a 
handful at a time, until all the Polenta is eventually in there. It is important to only do a handful at a time so that there are no lumps 
* This step should take about 15 minutes.
                               
* Now switch to a wooden Spoon and let cook while continuing to stir for
another 15-20 minutes. Make sure you keep stirring it to prevent lumps.
(It may look done, but it's not. It is important to make sure the Polenta is 
well cooked). 
                                                
* Next, spread the Polenta onto a Large Wooden Board (If you do not have a
large wooden Board, individual plates are fine.  
                 
* Spread a layer of sauce on top
* Generously sprinkle your Grated Cheese all over the top (half of the one 
shown has no cheese, because somebody didn't want any :/)
* Spread your Pieces of Sausage over the top.
* Enjoy eating this right off the board with a fork or get a spatula and serve
yourself some some onto a plate! Either way its delicious!
* A salad goes really well with this meal!